1. Introduction
Composting at home is one of the simplest and most impactful ways to reduce waste, enrich your garden, and contribute to a more sustainable lifestyle. With just a little effort, you can turn everyday kitchen scraps and yard clippings into nutrient-rich soil that will nourish your plants and improve the health of your garden beds. Whether you’re a seasoned gardener or a complete beginner, learning how to make compost at home is easy, affordable, and incredibly rewarding.
In this DIY guide, we’ll walk you through everything you need to know—from choosing the right materials and setting up your compost system, to maintaining it properly and using the finished product. Ready to turn your waste into gardening gold? Let’s get started!
2. Why Composting Matters
Composting isn’t just a gardening trend—it’s a powerful way to care for the planet and your plants at the same time. Every day, households throw away tons of organic waste that ends up in landfills, where it produces methane, a potent greenhouse gas. By composting at home, you’re reducing your contribution to landfill waste and helping combat climate change.
But the benefits don’t stop there. Composting transforms food scraps and yard debris into rich, organic material that improves soil structure, boosts plant health, and enhances water retention. Instead of relying on chemical fertilizers, you’ll be creating a natural, nutrient-packed soil amendment that supports a thriving garden ecosystem.
Whether you’re growing vegetables, flowers, or houseplants, composting gives your plants a steady supply of essential nutrients—without harming the environment. It’s an easy, low-cost way to make a big difference for your garden and the Earth.
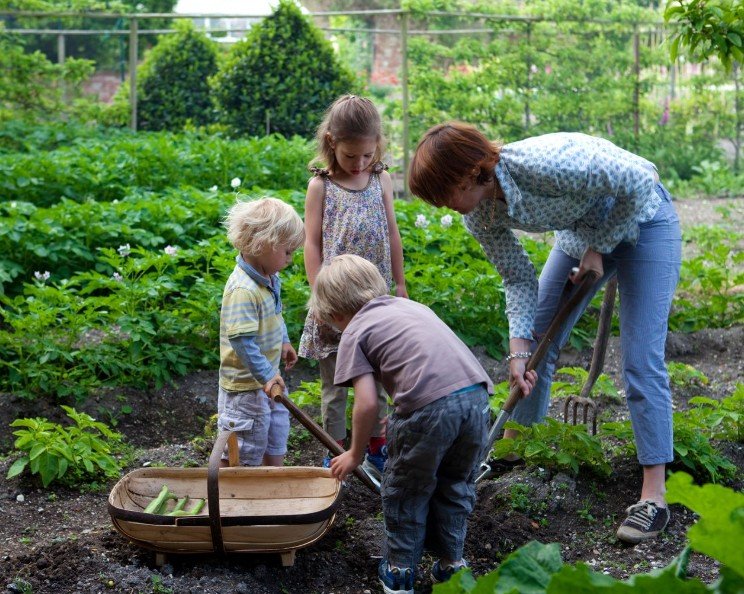
3. What You Need to Start Composting
Starting your own compost pile or bin at home doesn’t require fancy equipment—just a few basic materials, some space, and a little know-how. Here’s what you’ll need to begin composting successfully:
✅ 1. A Compost Bin or Pile
You can choose from a variety of composting setups depending on your space:
- Outdoor compost bins: These can be homemade with wood pallets, or store-bought plastic or metal bins with lids.
- Compost tumblers: Great for quicker results and easy turning.
- Compost piles: If you have a backyard, simply designate a corner for your compost heap.
- Indoor compost bins: Perfect for apartments—these come with lids and filters to reduce odor.
✅ 2. The Right Ingredients
Composting relies on two types of materials:
- Greens (Nitrogen-rich): Fruit and vegetable scraps, coffee grounds, tea bags, grass clippings.
- Browns (Carbon-rich): Dry leaves, shredded paper, cardboard, straw, sawdust.
You’ll need a good mix of both to create balance and promote proper decomposition.
✅ 3. Basic Tools
A few simple tools can help make the process smoother:
- Garden fork or pitchfork for turning the pile
- A small kitchen compost bin or caddy for collecting daily scraps
- Watering can or hose to keep the pile moist
- Gloves for clean and easy handling
✅ 4. A Well-Ventilated Spot
Choose a spot that’s dry, shady, and easily accessible. Good airflow is essential to help break down materials and prevent bad odors.
With just these essentials, you’ll be well on your way to creating rich, fertile compost—right from the comfort of your own home.
4. Understanding Compost Ingredients
Creating successful compost starts with understanding what you’re putting into it. Composting is all about balancing two key types of materials: greens and browns. These terms refer not to color, but to the nutrients they provide during decomposition.
🟢 Greens (Nitrogen-Rich Materials)
Greens are wet, soft materials rich in nitrogen, which help feed the microorganisms that break down the compost. These include:
- Fruit and vegetable scraps
- Coffee grounds and filters
- Tea bags (check if they’re compostable)
- Fresh grass clippings
- Plant trimmings
- Eggshells (crushed)
Nitrogen helps speed up decomposition and supports the production of heat in the compost pile, which is essential for breaking materials down effectively.
🟤 Browns (Carbon-Rich Materials)
Browns are dry materials rich in carbon, providing energy to decomposers and structure to the pile. These include:
- Dried leaves
- Straw or hay
- Cardboard and paper (shredded)
- Sawdust or wood chips (untreated)
- Corn stalks
Carbon-rich browns help keep your compost from getting too wet and smelly by soaking up excess moisture and promoting airflow.
⚖️ The Ideal Balance: 2 Parts Browns to 1 Part Greens
A healthy compost pile needs a good balance of greens and browns. A common rule of thumb is a 2:1 ratio—two parts brown for every one part green. This ensures proper decomposition, avoids foul odors, and keeps the pile from becoming too compact or too dry.
Understanding what to add—and in what proportion—will help you create compost that breaks down efficiently and results in dark, rich, crumbly material your plants will love.
5. Step-by-Step: How to Make Compost at Home
Ready to turn your kitchen scraps and garden waste into black gold? Here’s a simple, step-by-step guide to making compost at home—whether in your backyard or on your balcony.
✅ Step 1: Choose a Composting Method and Location
Decide whether you’ll use a compost pile, bin, or tumbler. Choose a dry, shaded spot with good drainage. If indoors, opt for a sealed compost container with airflow and keep it somewhere cool, like under the sink or on a balcony.
✅ Step 2: Add Your Browns and Greens
Start with a base layer of coarse browns (like dry leaves or cardboard) to allow airflow at the bottom. Then begin layering greens (food scraps, grass clippings) and more browns. Continue alternating to maintain a balanced mix.
Pro tip: Chop large scraps into smaller pieces for faster breakdown.
✅ Step 3: Maintain the Right Moisture Level
Your compost pile should feel like a wrung-out sponge—moist but not soggy. Add a little water during dry spells or if you’re using lots of dry browns. If it’s too wet or starts to smell, add more browns to absorb excess moisture.
✅ Step 4: Turn the Pile Regularly
Aerate your compost every 1–2 weeks by mixing or turning it with a garden fork or compost aerator. This introduces oxygen, speeds up decomposition, and prevents foul odors from developing.
✅ Step 5: Monitor and Wait
Continue adding scraps and turning your pile. In ideal conditions, compost can be ready in 6–8 weeks. You’ll know it’s done when it looks dark, crumbly, and smells earthy—like rich soil. No recognizable food scraps should remain.
By following these steps and being consistent, you’ll create a healthy compost system that transforms waste into valuable fertilizer—all from the comfort of your home.
6. Indoor Composting Solutions
Don’t have a backyard? No problem! Indoor composting is a practical and eco-friendly way to reduce waste and create nutrient-rich compost—even in a small apartment. With the right setup and a bit of planning, you can compost efficiently without odors or mess.
🪱 1. Vermicomposting (Worm Composting)
Vermicomposting uses red wigglers (a specific type of compost worm) to break down food scraps. This method is perfect for indoor spaces:
- Requires a small, ventilated bin with bedding (shredded newspaper, cardboard)
- Worms eat kitchen scraps and produce nutrient-rich castings (worm compost)
- Odor-free if managed correctly
- Ideal for fruit and veggie scraps (avoid citrus, onions, meat, or dairy)
🥬 2. Bokashi Composting
Bokashi is a fermentation-based composting method using a special inoculated bran:
- Uses an airtight bucket and Bokashi bran to ferment waste
- Can handle meat, dairy, and cooked foods
- Produces a pre-compost that can be buried in soil or added to an outdoor compost pile
- Compact and ideal for small kitchens
🪟 3. Countertop Compost Bins
These are great for collecting scraps until you’re ready to transfer them to your main compost system:
- Available in stylish designs with carbon filters to control odors
- Use them for daily scraps like peels, coffee grounds, and eggshells
- Easy to clean and convenient
🧼 4. Electric Kitchen Composters (Optional)
High-tech composters are now available that can break down scraps in hours:
- Compact, odorless, and fast
- Turn waste into dry, compost-like material
- Great for urban living but more expensive
🏠 Indoor Composting Tips:
- Avoid overloading your bin with wet food scraps
- Balance with shredded paper or browns to prevent smells
- Keep your bin in a cool, ventilated area
- Use a tight-fitting lid and clean regularly
With these indoor composting solutions, even city dwellers can turn everyday waste into garden-friendly compost—no backyard required!
7. Common Composting Problems and How to Fix Them
Even the most enthusiastic composters run into issues from time to time—but don’t worry! Most composting problems are easy to fix with a few simple adjustments. Here are some of the most common issues you might face and how to solve them:
🟤 Problem: Foul Odor
Cause: Too much green material (nitrogen-rich) or poor airflow.
Solution:
- Add more brown materials like dry leaves, cardboard, or shredded paper to absorb moisture and balance the mix.
- Turn the pile to introduce oxygen and improve airflow.
- Avoid composting meat, dairy, or oily foods which can rot and smell.
🔵 Problem: Compost is Too Wet or Sloppy
Cause: Excessive moisture from too many wet scraps or rain exposure.
Solution:
- Mix in more dry browns such as straw, sawdust, or shredded newspaper.
- Cover your compost with a tarp or lid if it’s exposed to rain.
- Turn the pile more frequently to promote drying.
🟡 Problem: Compost is Too Dry and Not Decomposing
Cause: Too many dry materials or not enough water.
Solution:
- Lightly water the pile until it feels like a wrung-out sponge.
- Add more green materials like fruit scraps or fresh grass clippings.
- Mix thoroughly to help moisture distribute evenly.
🐜 Problem: Pests or Insects in the Pile
Cause: Attracting rodents or flies with food scraps like meat or dairy.
Solution:
- Remove any non-compostable food waste immediately.
- Always bury fresh food scraps under a layer of browns.
- Use a sealed compost bin or tumbler to keep pests out.
⏳ Problem: Compost is Taking Too Long to Break Down
Cause: Poor ingredient balance, lack of air, or insufficient moisture.
Solution:
- Check your greens-to-browns ratio—adjust if needed.
- Turn the pile regularly to speed up decomposition.
- Chop larger items into smaller pieces before composting.
By keeping an eye on your compost and knowing how to respond to these common issues, you’ll maintain a healthy, efficient system that consistently produces rich, usable compost for your plants. A little troubleshooting goes a long way toward composting success!
8. How to Know When Your Compost Is Ready
Knowing when your compost is finished and ready to use is essential for getting the most benefit for your garden. Finished compost is a sign that all your careful layering, turning, and balancing of greens and browns has paid off. But how can you tell it’s ready?
✅ Signs of Mature Compost:
- Appearance: It looks like rich, dark, crumbly soil. There should be little to no visible food scraps or recognizable organic matter.
- Smell: Finished compost has a fresh, earthy scent—similar to the smell of forest soil. If it still smells sour, ammonia-like, or rotten, it needs more time.
- Texture: It feels soft and spongy. While small bits of twigs or eggshells may remain, they should be few and far between.
- Temperature: Active compost is warm as it decomposes. When the process is complete, the pile will return to ambient temperature.
🕒 Typical Composting Timeframes:
- Hot composting (frequent turning and ideal balance): 6 to 8 weeks
- Cold composting (minimal maintenance): 4 to 6 months or more
- Indoor methods like vermicomposting: about 2 to 3 months
🧹 Optional: Screen Your Compost
If you want a fine, smooth finish, sift your compost through a mesh screen or soil sifter. Any large, unfinished bits can be tossed back into your pile for further decomposition.
Once your compost is ready, it’s time to put it to work—feeding your garden beds, enriching container plants, or even using it as a lawn topdressing. Using finished compost is one of the best ways to boost soil health and ensure strong, vibrant plant growth naturally.
9. How to Use Finished Compost
Once your compost is rich, dark, and crumbly with that signature earthy smell, it’s ready to be put to use—and there are countless ways to take advantage of its nutrient-packed goodness in and around your home garden.
🌱 1. Enrich Garden Beds
Mix finished compost directly into your garden soil before planting. Spread 1 to 3 inches over your garden beds and work it into the top 6 inches of soil. This boosts fertility, improves texture, and enhances water retention.
🪴 2. Potting Mix for Containers
Use compost as part of a homemade potting mix. Blend it with ingredients like coconut coir, perlite, and garden soil to create a healthy growing medium for potted plants and seedlings.
🌼 3. Mulch Around Plants
Spread compost around the base of flowers, vegetables, trees, and shrubs as mulch. It helps retain moisture, suppress weeds, and slowly releases nutrients as it breaks down further.
🌾 4. Topdress Your Lawn
Sift compost and sprinkle a thin layer over your lawn (¼ to ½ inch). Water it in well—this topdressing helps thicken your grass, reduce thatch, and nourish the soil beneath.
🌿 5. Make Compost Tea
Soak compost in water to create a nutrient-rich “tea” that can be used as a liquid fertilizer. Simply place a shovelful of compost in a bucket of water, steep for a day or two, and use the liquid to feed houseplants, flowers, or vegetables.
Whether you’re growing lush ornamentals or a productive vegetable garden, finished compost is one of the most versatile and valuable tools you can use. It’s organic, sustainable, and completely free—made from the waste you’d otherwise throw away!
10. Final Tips for Successful Composting
To get the most out of your home composting journey, consistency and a little extra care go a long way. Here are some final expert tips to ensure your composting efforts are effective, efficient, and long-lasting:
✅ 1. Keep a Balanced Ratio
Always aim for a good balance of greens (nitrogen-rich materials) and browns (carbon-rich materials). If in doubt, it’s better to add a little more brown—this helps prevent odors and keeps the compost aerated.
✅ 2. Chop Large Items
Break or cut up larger food scraps and garden waste before tossing them in. Smaller pieces break down faster, speeding up the composting process.
✅ 3. Turn Regularly
Aerating your pile every 1–2 weeks introduces oxygen, which fuels microbial activity and prevents the pile from becoming compacted or smelly.
✅ 4. Monitor Moisture
Your compost should feel like a wrung-out sponge—damp but not soggy. Add water during dry spells and balance with browns if it gets too wet.
✅ 5. Avoid Attracting Pests
Don’t add meat, dairy, oily foods, or pet waste to your compost. Always bury food scraps under a layer of browns, especially outdoors, to discourage flies and rodents.
✅ 6. Use a Kitchen Scrap Bin
Keep a small compost caddy or bin in your kitchen to make it easy to collect scraps daily. Empty it regularly into your outdoor pile or indoor system.
✅ 7. Stay Patient
Compost isn’t instant—it takes time. Stick with it, observe the process, and tweak your approach as needed. Your garden will thank you!
✅ 8. Keep Learning
Every compost pile is different. Don’t be afraid to experiment with new materials, systems, or techniques. Over time, you’ll develop your own composting rhythm and style.
With these tips in mind, you’ll be well on your way to creating nutrient-rich compost that supports a healthy garden and a more sustainable lifestyle—all while reducing waste in your household. Happy composting! 🌿
11. Conclusion
Learning how to make compost at home is one of the most rewarding steps you can take toward a greener, more sustainable lifestyle. Not only does composting help reduce household waste, but it also gives you a rich, natural fertilizer that can transform your garden, improve your soil, and boost plant health—without the need for synthetic chemicals.
Whether you’re composting in your backyard, on a balcony, or even in your kitchen, the process is simple, cost-effective, and deeply satisfying. By understanding the right ingredients, maintaining the proper balance, and being consistent with care, you can turn everyday scraps into black gold for your plants.
So start small, stay patient, and enjoy the process. With a little time and effort, your homemade compost will become one of the best tools in your gardening toolkit—and a powerful way to give back to the Earth. 🌱